Catalog
-
Catalog
- Agriculture
- Apparel
- Automobiles & Motorcycles
- Beauty & Personal Care
- Business Services
- Chemicals
- Construction & Real Estate
- Consumer Electronics
- Electrical Equipment & Supplies
- Electronic Components & Supplies
- Energy
- Environment
- Excess Inventory
- Fashion Accessories
- Food & Beverage
- Furniture
- Gifts & Crafts
- Hardware
- Health & Medical
- Home & Garden
- Home Appliances
- Lights & Lighting
- Luggage, Bags & Cases
- Machinery, Hardware & Tools
- Measurement & Analysis Instruments
- Mechanical Parts & Fabrication Services
- Minerals & Metallurgy
- Office & School Supplies
- Packaging & Printing
- Rubber & Plastics
- Security & Protection
- Service Equipment
- Shoes & Accessories
- Sports & Entertainment
- Telecommunications
- Textiles & Leather Products
- Timepieces, Jewelry, Eyewear
- Tools
- Toys & Hobbies
- Transportation
Filters
Search
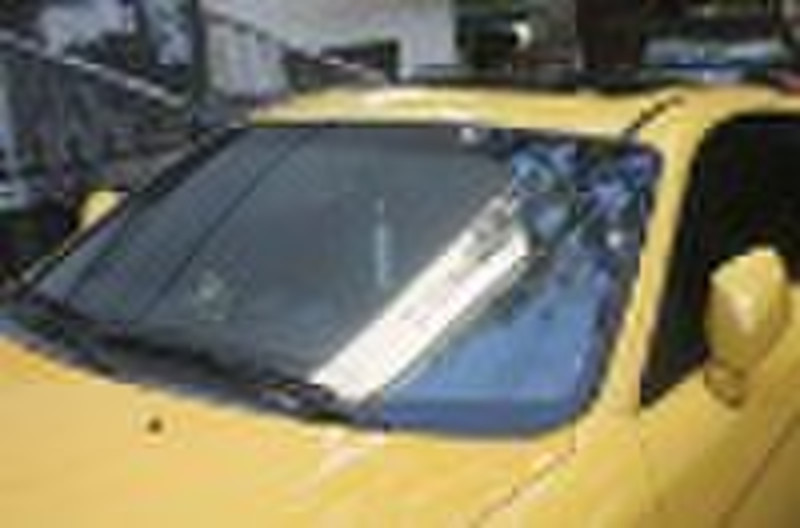
Window Film for building
original price: 5,00 USD
Guangzhou, China
Production capacity:
10000 Roll / Day

Tom Shen
Contact person
Basic Information
| Place of Origin | Guangdong China (Mainland) |
|---|---|
| Brand Name | DOOP |
| Model Number | DP |
| Function | Decorative |
| Feature | Self-Adhesive |
| Surface Treatment | Stained |
| Material | PET |
| Type | Floor Films |
Technical Specifications: - Visible Light Transmitted (VLT): 5% to 85%; - Solar Energy Rejected (IRT): 5% to 95%; - Ultraviolet Rejected (UVR): 96%(±3%); - Tickness: 1.5mil to 4mil (1mil=1/1000inch=0.00254cm=0.0254mm); Installation Instructions Basic Tools required: · Spray bottle (with baby shampoo & water) · Olfa knife (cutter) & blades (always be careful not to cut yourself) · Squeegees · Scraper & blades (always be careful not to cut yourself) · Misc.: o Baby Shampoo o Paper Towels (lint free) o Razor (1” razors) – careful not to cut yourself or others! Step 1: Preparing the Installation Solution · Get your spray bottle & trigger · Put 5-10 drops of baby shampoo in a one quart spray bottle o Amount of shampoo depends on how much lubricant you want/need. Beginners usually want more shampoo. The more shampoo, the more “slippery” it is. Too much shampoo can cause the film to slide off the window. In cold environments, it takes longer to dry & can slip off § When installing safety film, too much shampoo can cause the heavy safety film to slide down the window before the adhesive has time to activate with the glass. Thus, use less shampoo. o Amount of shampoo also depends on your water’s ph balance. Each area & tinter uses a different amount of shampoo based on water and experience · Fill the bottle up with water & shake · Adjust nozzle to have a nice even spray Step 2: Preparing the Glass · Note: All dirt & debris must be taken out. Any debris or “dust” on the glass, window frame or air that gets trapped between the film & glass will show. So clean, scrape, clean, and clean. Then clean the window again. · Wash the side of the glass on which you want to affix the film with your solution. After that, spray it again with the soapy solution. · Scrape the window clean of any adhesive, grease, paint, varnish, stickers, dirt and any other foreign matter using a scraper / razor blade. Be careful not to cut yourself. Clean the corners extra well. Wipe clean and dry with paper towels (lint free) · Clean the glass surface again o Wipe excess water with squeegee o Wipe down corners with lint free paper towel · Spray the entire surface again with the soapy solution. Step 3: Preparing the Film · Measure the surface of the glass and cut the film one inch wider and one inch longer than the glass surface. (Be careful not to get “paper cuts” from the sides of the window film) · Stick a piece of tape on either side of the film. Pull each piece of the tape outwards in the opposite direction. · Remove the liner and activate the adhesive by spraying it with the soap solution. · Apply the solution on the film thoroughly, including the edges. Step 4: Applying the Film on the Glass · Prepare the window surface for application by spraying it thoroughly with soap solution so that it’s wet. · Pick up the film by the corners and place the adhesive side against the glass, moving it around until it’s positioned properly. · Look at it from various angles to check whether it’s been placed properly. Step 5: Squeegee out Excess Water and Air Bubbles · Spray the exposed side facing you with the soapy solution. · Using a squeegee, squeegee the film from top to bottom to remove the excess water and air bubbles. Step 6: Finishing Touches · Trim the excess film carefully using an olfa knife (cutter) o Be careful not to cut yourself! · Spray the film with the soap solution and squeegee again to remove all excess water and air bubbles from under the film. · With safety film, use extra pressure to make sure you get all the water out. · If needed, squeegee again (spray solution on top of the film to avoid scratching it.) · Place a paper towel on the squeegee and squeegee all the edges by stroking towards the glass frames. View the window from outside; if any air bubbles are seen, squeegee and remove them. · Clean up and make sure you picked up all olfa blades & razor blades There you have it! Your window now has a cool new look, offering you protection against the sun. Performance: 1.High heat rate Differ from Curtain and shutter , a layer of heat insulation film can be equivalent to 24 centimetres walls heat insulation, it can block up above 79% heat may enter the house through the window . 2.Preserve the privacy It can keep your privacy, but also your living space free. 3.Winter to keep warm In winter it can be 20 to 30% of heat reflection back to the house to make the house more warm and comfortable. 4.4.To protect furniture. Window Film can be separated out 99% of aging caused by ultraviolet furniture to protect the furniture, flooring and curtain. 5.Explosion-proof Broken glass in the event of an accident, it can prevent the spatter scattered broken glass, thereby protecting the safety of you and your family. Please feel free to contact us.
Delivery terms and packaging
Packaging Detail: Carton1.52 X 30m/roll(One roll in a carton)2 Customized by customer. Delivery Detail: Depend on the quantity
Port: Huangpu(Guangzhou)
Payment term
Telegraphic transfer
Paypal
Western Union
-
Payment Methods
We accept:


