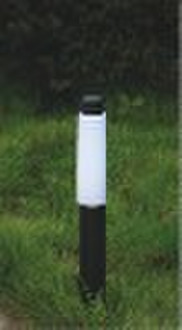

Outdoor-Garten-Licht-12V 1700mA, IP44

Jack Ning
Kontaktperson
Basisdaten
Outdoor Garden Light 12V-1700mA, IP44 Item No XX-2079 Operating voltage 230V 50HZ Cover Plastic Finish Spray paint/plating Outstanding feature Rainproof, shockproof, corrosionproof Constant current 1700mA Lighting Range 10m Max 4*5W Diffuser Plastic Bulb type JC Single bulb power 5W Rated output power 20.4W Energy saving >90% Lights per set(pcs) 4 Light color Warm white Light source Low energy consumption, low light regression, no frequent flashing Certificate CE, UL, GS, SAA, ROHS Sales Market Europe, USA, Africa, Middle east, Egypt Rated output voltage 12V Protection Rank IP44 Plug UL Color box 16*10*36.5 CTN(cm) 51.5*33.5*38.5 Quantity(pcs/carton) 10 Lifetime >50,000 hours Working temperature -35 +45°C The safe and easy way to brightly illuminate your garden at night. Perfect for lighting borders, paths, patios and driveways. 12V low voltage for safety and peace of mind.Set of 4 lights complete with 8m of cable and outdoor transformer.Pre-positioned lights for ease of installation-simply plug-in and switch on.Stylish, contemporary design.Installation:Installing you garden bollard kit is quick and simple. Please take your time installing these lights, and you will enjoy years of enhanced garden lighting.Before connecting your lights to the cable position the transformer near the power outlet you plan to plug it into, however DO NOT connect the transformer at this stage.Uncoil the cable and run the cable along your desired installation, and then begin to assemble the lights, and attach them to the cable per following steps:1. Attach the plastic spike to the stem by pushing it into the bottom of the stem.2. Remove the opal plastic diffuser by holding it firmly, and carefully pulling out.3. Using a soft coth, Insert the light globe; 12V 5W (MAX) Wedge Globe, by aligning the globe with the lampholder, and pushing in firmly.4. Reattach the opal diffuser by inserting it into the Stainless steel tube, and pushing in firmly. It is important that the diffuser is installed correctly to ensure no water can enter the light.5. Repeat the above procedure for all lights in the kit.6. Connect the fitting to the 12V-supply cable. Ensure the connected transformer is disconnected prior to connection. NEVER overload the transformer by adding more lighting than it’s designed for.NB: There is no correct side of the supply cable to connect to, that is, there is no prescribed positive or negative that needs to be matched at each light. The exposed end of the cable must not lie exposed underground or be allowed to become wet since this would create a short out and damage the transformer. Make sure the cable end is sealed with silicone or insulation tape before burying underground.7. Unscrew the top of the connector block as pictured in Figure 1.8. Run the cable from the transformer through the channel of the connector block as per Figure 2.9. Using the handle of the screwdriver, push the cable down onto the metal pins ensuring that the cable is aligned so that each pin pierces each side of the cable. DO NOT use your fingers to push the cable onto the pins.10. Screw the connector block back together making sure that the metal spikes have pierced the plastic around the cable.11. Once fully assembled the bollards can now be spiked into the ground. The plastic spike is not built to withstand heavy impacts with rocks; you may have to remove any rocks that prevent penetration of the spike into the topsoil.12. Once all of the bollards have been positioned into the ground, plug in the transformer into the wall outlet and ensure that each of the bollards are working.NB: If one or more of the bollards are not working, repeat steps 7 to 10, to ensure the cable has been correctlypierced by the metal spikes.13. When all bollards are working, and you are satisfied with your garden lighting, simply push the cable into theground, and cover with topsoil for a neat and tidy finish.Cabling:There is no “correct” side of the included cable, that is there is no prescribed positive and negative that need to be matched to each light, however you must ensure that the exposed end of cable is suitably terminated with connectors.Transformer:· Do not allow transformer or connections to become wet.· Never allow the transformer to become wet or be exposed to liquids of any kind. Naturally your cable and Bollards will be subjected to rain and moisture, and have been designed to efficiently protect electrical parts from exposure. This is not so for the transformer which must always be kept dry.· The transformer supplied may differ slightly to the model shown.
Lieferbedingungen und Verpackung
Packaging Detail: Color box with cardboard carton or according to customer's request Delivery Detail: 15-30 days after receiving advanced deposit
Hafen: Ningbo
Zahlungsbedingungen
Letter of credit
Telegraphic transfer

-
Zahlungsarten
Wir akzeptieren: