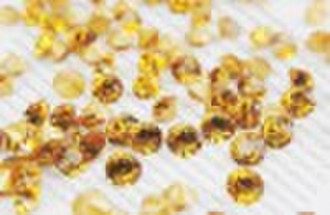
crystal pointed back Rhinestones MH-SD0015
原价: 6,36 USD
金华镇, 中国
生产能力:
100000 包 / 世纪

Elleyan Ho
联系人姓名
基本信息
| 出生地 | Zhejiang China (Mainland) |
|---|---|
| 牌子的名字 | Minghuang |
| 模式的数量 | MH-SD0015 |
| 技术 | 抛光 |
| 风格 | 董模仿 |
| 使用 | 家里装饰的 |
| 主题 | 爱情 |
| 区域特点 | 欧 |
pointed back rhinestones add sparkle and pizzazz to any item. Pointed back rhinestones require the use of special settings instead of glue. However, the use of a setting to attach your Swarovski pointed back crystal provides for a more secure attachment to your item than glue. You can use two different types of settings to attach your pointed back rhinestones. The first are called Tiffany-prong settings, which have tiny prongs that go thru the fabric to hold the pointed back rhinestones by folding over them. The second type of setting is called a Rim setting. A Rim setting covers your pointed back crystal from the front with a “rim” and has its prongs stick thru to the back of the fabric to hold the “rim” over the pointed back rhinestones. To start a project utilizing your pointed back rhinestones you will need your Tiffany or Rim settings, tweezers (or a rhinestone perfect positioner), permanent marker or dressmaker’s chalk (to sketch out your design) and a stapler setting tool (or other hard surface tool to help bend the prongs). Make sure to draw out your pattern on paper first to make sure that your project will look exactly like you want it to. Additionally, pointed back rhinestones can be hard to handle so a good pair of tweezers or a rhinestone perfect positioner are essential. Remember, you cannot glue a Swarovski pointed back crystal onto your item. The glue will not hold the pointed back rhinestones as they don’t have a flat service like typical flatback and hot fix rhinestones.
交货条款及包装
Packaging Detail: 10 gross /bag ,50 bags in one small box ,6 small boxes in one chaton Delivery Detail: depend on the quantity of client
端口: Shanghai, Ningbo
付款条款
Telegraphic transfer
Western Union
-
支付方式
我们接受:


